Counterfeit Detection Lab
Airtech's in-house counterfeit detection testing lab is provisioned with the most advanced in-house tools to verify component authenticity.
With destructive, non-destructive, and custom testing solutions available, the integrity of your parts will never be in question.
Visual inspection
Visual inspection is a large part of our overall quality inspection.
Components are checked for lead damage such as corrosion or solder on pins, retinned or refurbished leads, dents, dissimilar gloss, shine, color or texture top surface inspection includes surface cracks, scratches, appearance of resurfacing or remarking part markings must be consistent relating to font, color or placement, date codes, lot codes and country of origin must all be consistent, parts are checked against manufacturer data sheets and photos are taken at all stages of inspection.
These tests will not only find remarked devices they will also be able to tell if your components are NEW and UNUSED, as Refurbished components are also classed as Counterfeit if sold as New and Unused.
X-RAY
X-ray is a relatively inexpensive and non-destructive with minimal set-up and immediate feedback on the interior structure of a device.
X-ray allows the operator to view the internal die orientation, bond wire patterns, and any foreign material or voids. It can help detect any abnormalities without being destructive to the units.
Uniformity of internal structures is further evaluated among material within the same lot/batch
-
Printed Circuit Boards
-
Solder joint formation
-
Metallization defects
-
Solder formation and voiding
-
Die attach
-
Foreign material
-
Bond wire sweep
-
Opaque particles
De-Cap & Die Verification
Destructive Physical Analysis
Decapsulation is a process that removes a portion of the device body either chemically or mechanically and inspects the interior die. Die markings, including manufacturer and part numbers, are inspected and verified along with die position, size and orientation.
After component decapsulation, the final step in visual die verification is to test the part using ultra high-resolution metallurgical microscopes fitted with high-resolution digital cameras.
Digital photos of the die taken during inspection capture the manufacturer's logo, core part number, and any additional relevant die markings that are present.
Heated Solvent Testing
This process is removes the markings and the top layer of the component to evaluate for signs of remarking. This can include: prior markings, sanding, pitting, differing body material, or other evidence of tampering.
A more effective method of revealing occurrences of resurfacing. This process includes suspending a sample component in a solution submerging half of the component. As the component remains in the solution for an extended period of time, any resurfacing or remarking on the submerged end will be removed while the portion remaining above the surface will remain unaffected.
XRF Analysis Testing
Provides rapid semi-quantitative elemental analysis
Typically used for:
-
RoHS compliance screening
-
Verify lead finish
-
Verify Pb presence where required
Memory Blank Testing
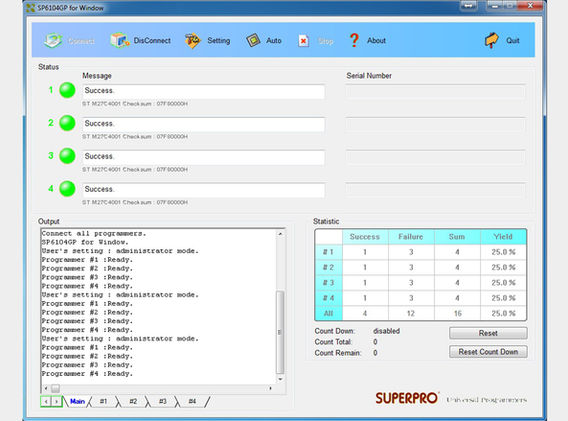
Our memory test uses programmers to check for Counterfeit Programmable components.
Using this memory test tool, we can easily check device ID codes and confirm if your devices are BLANK or already programmed.
Pin Print Detection
Electric Test
SENTRY is an easy to use tester, aimed at goods inwards inspectors and designed to measure the unique electrical signature (PinPrint) of components.
The information collected is managed through a database and is used to compare known good devices against suspect components.
Typically, SENTRY can easily detect missing or incorrect dies, lack of bond wires, inaccurate pin outs and pin impedance variations. Simple pass or fail results are returned after testing, offering a high level of confidence in the authenticity of components.


